This week we we’re given the task to visit a local thrift shop and find items we could potentially repurpose so they interact with our Maker Kit and fit into our classroom curriculum (or serve some purpose in our classroom).
Before I headed to the local Thrift Shop, I decided to play and experiment with my Maker Kit so I had a better idea of what types of objects would interact well with my particular kit. I purchased the Squishy Circuits Maker Kit. I decided on this kit because the price point matches what my school could potentially afford in case the kit turns out to be something I want in my classroom. I also chose it because I don’t know much about circuits and after exploring my other options Squishy Circuits seemed like the most straightforward kit for a newbie like myself. I liked the Makey Makey Kit, too but I wasn’t sure how I could use it my classroom. I saw more potential for Squishy Circuits to be implemented into my math curriculum. Before I could start my playtime, I had to make the conducting dough and insulating dough. The instructions & materials for the dough are given inside the box. There are also video tutorials or step by step tutorials with photos on the Squishy Circuits website, but I had no problem following the instructions using the box. After that I tuned into the video page on the Squishy Circuits webpage and began creating the circuits. I started by creating a circuit with just one light and then worked my way to adding lights, the motor, and one buzzer. The video also helped me understand how electrical currents work and what the purpose for each dough was. I played for about two hours until I felt comfortable and then headed off to the thrift store with ideas in mind.

With the “maker movement” fresh in my mind from last week, I headed local Thrift Store, literally. However, the inside of the store was chaotic…there wasn’t organization and a lot of the materials were past their repurposing days, so I headed two stores down to Goodwill, which had plenty of good options. I was hoping to do something with graphing, gaming, or matching so I was looking for metal objects–such as a cheese grater, noodle strainer, cooling rack—or a board game. I didn’t find any game boards I felt I could work with but I did find plenty of metal objects. I was hoping I could use the metal like I used the conducting dough, which I later found out worked to my disadvantage. I found a cooling wrack, cheese grater, metal triangle, and a broken locker stand. I opted for the broken locker stand at the low, low price of $2.49.

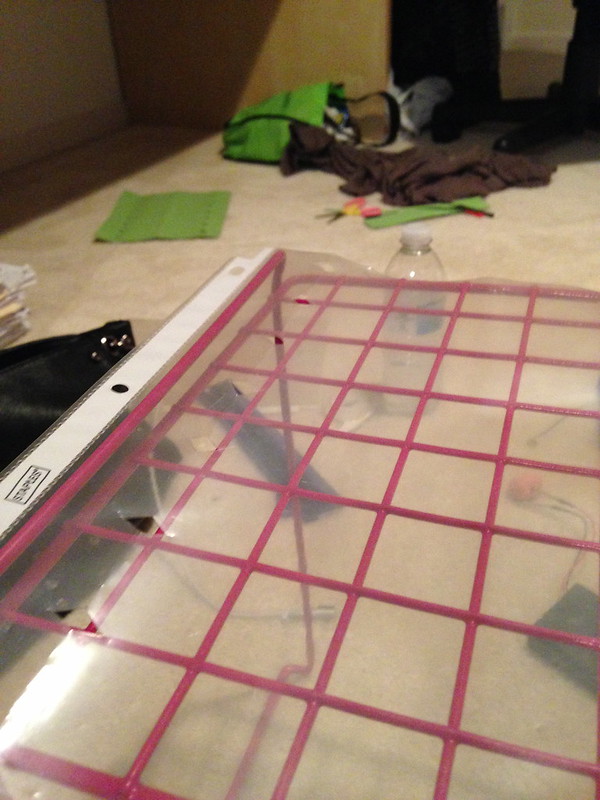
At home I spent the next 7.5 hours trying to come up with something useful to make. You can watch some of my videos and check out some pictures below. I tried to make a Connect Four-type game where the learners would use their colors opposed to the traditional red and black game pieces. The wire grid on the locker stand would be the game board and the option to add a light would be based on math questions (perhaps using the buzzers) not on turns, like the original game is set up. However, with only five LEDs for each color, I realized this would not work. However, I could always buy LEDs if it were something I wanted to pursue. I also tried to make a matching vocabulary game. I used a plastic sleeve over the grid so I could change out the questions and answers. I had it set up where the questions were listed 7 down the left and answers were listed 7 down the right. I thought the wires on the rack would help me connect the correct answers, but instead the wires used the battery, dimmed the lights and made all of the answers work opposed to just the correct one. I thought about using dough instead of wires to connect answers but there would be a ton of overlapping and crisscrossing and the conducting dough would eventually touch another piece of conducting dough on another path, even if it started out separated by insulating dough. Next I made an adding fractions game. One square had the question and its match had the answer. The player would use the wand to touch the question and the answer, if the squares were a match they would light up the same color and the player would remove the lights. Just like the traditional game, the player with the most LED pairs would win. This idea worked well, but I felt like I didn’t need the locker stand I bought… it wasn’t a necessary piece. I just slide a game board over the metal and put the conducting dough underneath. The metal grid could easily be removed and it wouldn’t make a difference. My final idea came after brainstorming with my roommate and her boyfriend. The power of communication was AMAZING. At this point I was frustrated, so it was nice to have them help me reorganize my ideas. Now I understand why the Maker Faire is so great. Not only do individuals get to share their inventions, they get to collaborate and brainstorm new ideas with one another. I came up with a game and used the repurposed locker stand as a game board. My roommate’s boyfriend was nice enough to rip the stand off of the grid part for me so I could lay the “game board” down flat. I’m still not positive that the metal grid (repurposed locker stand) is a huge component, but it is part of the game so I went with it. Thankfully I had the game Cranium so I repurposed the dice and implemented it into my game, too.Check out the How to Guide below.
http://www.flickr.com/photos/77028904@N05/10657120664/
Wanna hear the most annoying sound ever?
Playing around with using the motor as a spinner, the sushi roll circuit, and how to attach the buzzers so the lights work and the buzzers make a noise:

HOW TO:
My creation using Squishy Circuits is a game called Race to the Top. The game uses the embodied nature of learning mathematics while connecting technology and creativity (Punya, 2012, p.15). The goal is for two players to complete math tasks, based on the luck of the roll, and the first person to buzz in with the correct answer gets to put their color LED light in their tower. The first player to the top wins.
Stuff You Need:
- Squishy Circuits Maker Kit (comes with kit except dough)
- Conduction Dough & Insulating Dough (here are cooking directions & ingredients)
- Two different colored sets of five LED lights
- Two buzzers
- Battery pack (need four AA batteries for battery pack)
- A repurposed locker stand or grid with large squares (shown in image at beginning of post)
- Construction paper, scissors, and markers for Game Board

- Four Different Colored Game cards (you can create the categories and cards as you wish) http://www.flickr.com/photos/pixies/11688117/
- Cranium game dice http://www.flickr.com/photos/ashleyv/80722209/
How to Set the game UP:
Using the conducting dough, you need to make two “u” shaped paths as shown below. It is important that one “u” is connected to the positive cord on the battery pack and the other is connected to the negative cord on the battery pack, or one is connected to the red cord and the other to the black cord.


Next you need to attach the two buzzers from the kit- one for each “u” shaped path. I placed mine on opposite sides, but it doesn’t really matter where you place them as long as you connect the red wire from the buzzer to the “u” shaped path that is connected to the red wire off of the battery pack.
You will leave the black cords unconnected. When they buzz in their answer they will touch the “u” shaped path that is connected to the black wire. This will complete the circuit and make the buzzer make the noise.
**it is important to make the “u” paths close enough (but not touching) so the LED lights can have one leg in the negative “u” path and one in the positive “u” path so they light up when they are placed in the tower.
Once the circuit is set up you can place the repurposed locker stand or grid with squares on top of the circuit. Then place the game board on top of the metal grid so that the five squares show through the holes. You will want to cut the section out of the construction paper to fit the grid you use for the game.
**before placing the grid and game board down test out your buzzer and LED lights.

The game is ready to go. Now you just need to create your four-color categories for cards. I would choose vocabulary, constructions, computation (ex: what is the slope of the line perpendicular to the give line), and critical thinking (multi-step problem), but that matches my geometry curriculum.
Game Play:
The youngest play will roll the dice first. Then they will draw the matching color card and read it aloud so both players can attempt the task. Whatever player finishes the task first connect the black cord from their buzzer to the circuit. If they have the answer correct they get to add their color LED light to the bottom square in their tower. It should stay lit up. The first player to fill their tower wins.
In the event of a tie, each player will read his or her answer aloud. If both are correct the player who is up to roll next will roll the dice and the players will complete that task for double LED squares, like the card game WAR.
In the event that neither player can complete the task or they both get the answer wrong, no one will gain a square in the tower and the game will continue on normally.
Troubleshooting:
If a buzzer doesn’t work you will need to check out your “u” shaped circuits and each red/black cord connection. The paths may be too thin for the current or you may need to moisten the dough. Sometimes the cords can become loose as the play dough stretches during gameplay. Just re-roll the dough and reinsert the cord. As LED lights are added to towers it is normal for the lights to dim because the current is giving power to more things (buzzers, additional LED lights). This is visible in the video above. Watch when I use the buzzer, the light dims. You may also want to check your batteries if all your paths and cords seem to be attached and laid out correctly. Worst case scenario, one of your buzzers doesn’t work. One of mine didn’t; however, you could play with one buzzer.
If you have trouble with circuits use this site here for support: http://courseweb.stthomas.edu/apthomas/SquishyCircuits/videos2.htm There are several how to videos that will walk you through the ins and outs of building circuits.
You may also use this gaming approach to educate players on how to create the circuits before this game is played: http://learn2teach.pbworks.com/w/page/40939766/Power%20to%20all%20the%20People
Now You’re Ready to Play:
You’ve just used Squishy Circuits to create a game board using buzzers and lights. The game play is practical and fun. It requires learners to complete different math tasks as they race against their partner. In terms of the process, putting together the circuits for the game requires learners to follow logical steps, which is much like a geometric proof. If they do not complete a step correctly, they will not have a working circuit. From the set up of the game board to actually playing the game, Race to the Top supports critical thinking for geometry classes.
Resources
Mishra, P., & The Deep-Play Research Group (2012). Rethinking technology & creativity in the 21st century: Crayons are the future. TechTrends, 56(5), 13-16.
