Our task this week is to design an “Ultra Micro MOOC” that teaches a specific skill or technique to a target audience. MOOC stands for Massively Open Online Courses. These courses, offered on websites like P2PU, are changing the face of education and learning. The courses are free to virtually anyone who wants to participate and has internet access. Certificates of completion are award to individuals who complete the course requirements. Although I wasn’t able to actually create a MOOC, I have put together an outline of what one would look like if created. Enjoy!
In my “Keeping Warm One Stitch at a Time” course, my peers will master the basics of knitting a scarf by progressing through a series of mini lessons and sharing updates on their progress and problem solving techniques with their peers online.
Course Topic: Introduction to Knitting
Course Title and Photo: Keeping Warm One Stitch at a Time
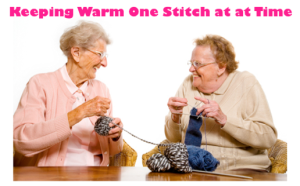
Photo: Licensed Under CC License 3.0
Who is coming to your course? Why would they want to participate in this experience? This course will attract individual of all ages who are interested in a creative outlet for a multitude of reasons, no experience necessary. When people hear the word “knit” they often envision a group of grandmothers, sitting in rocking chairs, knitting pastel colored snowcaps, complete with a fluffy pom on top. However, knitting has been redefined in the 21st century as a creative-DIY outlet for all individuals: old, young, male, female; no experience necessary. Learners will be attracted to the experiences this course will provide for a multitude of reasons unique to their individual motives. While the final knitted product is often the goal, it is typically not the reason why individuals choose to learn to knit. Knitting is not a one-size-fits-all hobby. Some knit to give: to charities, babies, people in need, friends, etc. Others knit for themselves: for social networking, for fashion, for therapy, for accomplishment, for tradition. Regardless of whether you are knitting angry knots or joyful knots, knitting is a timeless, creative outlet and/or hobby that fulfills the various needs of learners on an individual level- it’s comfort food without the calories. Knitting is a creative problem solving process that turns boring things into interesting things and often provides feelings of contentment along the way. This course provides an entry point into the creative world of knitting. In this course learners will learn the basics of knitting by creating a scarf thus increasing their skill level and interest to a point where they can seek other creative knitting options.
What do you want learners to be able to do when they are done? The learners will be able to knit a scarf by the end of the MOOC. More specifically, by the end of the course, participants will be able to cast on the stitches that are necessary to begin their scarf making process, knit additional rows to create a desirable length-counting stitches along the way to ensure they haven’t dropped any stitched, cast off their stitches to complete their scarf, and add fringe for as a creative touch. Each lesson is scaffolded (Vygotsky, 1978) to help participants reach mastery learning, as discussed by Bloom (1974). Knitting is a great example of mastery learning because individuals must master individual skills in a logical, planned progression, such as casting on, knitting rows, casting off, then adding fridge, which when put together create their final product (Yelon, 2001). One great thing about knitting is that no matter what your skill level may be, once you have mastered the basic stitch, it is possible to knit an entire scarf. Through practice and experience, the skill can be mastered.
Knitting is a learning activity that is grounded in constructivist principles (Piaget, 1971). It requires learners to problem solve as they progress and create.By allowing students time to experiment and observe before they analyze and deduce, the learners will be able to see the “big picture” and how their progression relates to the overall goal (Dienes, 1969, p.32). This idea can be see in the work of Dienes (1969) and his theory for learning mathematics. Moreover, the lessons in m MOOC are set up with the end in mind. That is, the lessons are laid out in the most effective way for achieving each specific goal along the way in terms of how they relate to the final goal: a knitted scarf (Wiggins, 2005). The logical progression will help students see the purpose for each lesson and how to appropriately problem solve when they make a mistake. For example, it is typical for beginners to drop stitches as they knit; however, since they are actively engaged in their learning process, they are aware of their overall goal, and because the lessons have been scaffolded to support such errors, they will learn how they can fix their mistakes without starting over completely (Piaget, 1971). By planning each lesson this way, the teacher is able to predict misconceptions and plan activities accordingly (Wiggins, 2005, pg. 13). The lessons in my MOOC also provide periods of reflection and online discussion that allow individuals to learn from their peers, provide feedback to their peers, ask for feedback, and share their work. Through this process, thee learners will make connections within their observations and their peers’ feedback in terms both relate to their experiences and their overall progression towards the end goal (Polya, 1957).
What will peers make? The final product for this MOOC will be more than a scarf. The peers will be required to make a video reflection that shows they have mastered each individual task (casting on, casting off, basic stitch, fridge) necessary to reach the final goal: their completed scarf. They will reflect on the problem solving progress along the way. The video will be posted to the course discussion forum and members of the group will provide feedback on at least one other person’s video reflection.
How do those activities hang together as a course? How long is your course experience? This course is a self-paced course that runs for approximately 6 weeks and is driven by the learning theories and practices discussed above. Tasks and projects will be implemented to ensure learners master the following skills: casting on stitches, knitting using the basic stitch, casting off stitches, and adding fringe. Moreover, practice of new skills will need to occur between each lesson to ensure the learner has reached mastery and can use the skill as a foundation for the subsequent skill (Yelon, 2001). The course will consist of diagrams and videos to support students as they learn how to knit a scarf. The course will also utilize a discussion board as means to: ask questions, post assignments, reflect, seek feedback, and provide feedback. The tasks for each week of the course are outlined below.
Course Outline
Introduction: There will be a video introduction that discusses the various purposes for knitting. The learners will be exposed to the final goal, the steps they will take to reach the goal, and the final product of how they will present their learning and mastery. This lesson will discuss the materials needed to knit a scarf: yarn, needles, & Internet access and will briefly discuss the time commitment for each lesson.
Lesson 1: Setting Goals
This lesson will begin by having learners choose the size of their needles, the type of yarn they would like to use, the length they would like their scarf to be and the width they would like their scarf to be. The lesson will provide information on how the size of the knitting needle affects the scarf. The lesson will also briefly discuss types of yarn and where supplies may be purchased.
Lesson 2: Casting on Stitches
This lesson will teach learners how to cast on stitches using the “backwards loop cast on”, which is often the most difficult task for beginners learning to knit. Casting on is the process of adding the very first stitches onto the knitting needle before starting to knit. The lesson will provide diagrams on how to successfully cast stitches on to a knitting needle using the backwards loop method. The steps show learners how to create a slipknot, how to place the knot on a knitting needle, how to hold the yard and the needle, and how to add additional stitches. The learners will be required to take the stitches off and practice the task several times. They will decide how many stitches they want for their scarf (depends on how wide they want it). By the end of this lesson the learner will have mastered casting on stitches and will be ready to add additional stitches next week. There will be a discussion board forum where learners will post a picture of their stitches on the needle. Learners can also use this forum to seek feedback from the instructor or their peers.
Lesson 3: The Basic Stitch
This lesson will show learners how to add stitches to the row they added in the previous lesson. There will be a video tutorial and diagrams. The learners will be required to drop a stitch, which is a typical error when knitting, and learn how to fix it. They will practice unraveling the bad row of stitches and fixing it. The learner will provide a video that shows they have mastered the basic stitch and can fix a dropped stitch.
Challenge Lesson: Adding Stripes or Colors
This lesson extends the technique of the basic stitch by adding color (doubling up yarns) or adding stripes (switching out yarns). This lesson is intended for learners who are confident in their knitting, have mastered the previous skills, and are looking to add a creative touch. There will be a video tutorial for this lesson. This lesson is not required.
Lesson 4: Casting Off
This lesson will teach learners how to successfully cast off their last row of stitches to create an edge that will not unravel. If done incorrectly, the scarf will unravel. The task will require learners to create a swatch that they will practice casting off on. This will ensure they have mastered the task before they attempt to do it on their scarf. The learners post a photograph of the swatch on the discussion forum and reflect on their problem solving process.
Lesson 5: Your Creative Touch- Adding Fringe & Reflecting
This final lesson will show learners how to add fridge to their scarf through diagrams. All learners will add fringe, but will understand that it is not necessary for their future projects. The learners will post an overall reflection on the discussion forum, they will respond to their peers reflections, and they will begin putting together a plan on how they will complete their final project.
Final Project
The learners will create a video reflection that shows they have mastered each individual task (casting on, casting off, basic stitch, fridge) necessary to reach the final goal: their completed scarf. They will reflect on the problem solving progress along the way and how their mastery of each lesson helped them on the subsequent lesson. They will also share insights and tricks they learned during the process. The video will be posted to the course discussion forum and members of the group will provide feedback on at least one other person’s video reflection.
“Staying Warm One Stitch at a Time” by Kristen Dyksterhouse is licensed under a Creative Commons Attribution-NonCommercial-ShareAlike 3.0 Unported License.
Resources
Bloom, B. S. (1974). An introduction to mastery learning theory. In J. H. Block (Ed.), Schools, society, and mastery learning. New York: Holt, Rinehart & Winston.
Dienes, Z. (1969). Building up mathematics. (rev.ed.) [Print]. London: Hutchinson Educational.
Piaget, J. (1971). The psychology of intelligence. [Print]. Boston: Routledge and Kegan.
Polya, M. (1957). How to solve it. (2nd Ed.). New York: Doubleday.
Vygotsky, L. (1978). Interactions between Learning and Development. In Mind In Society (M. Cole, Trans., pp. 79-91). Cambridge, MA: Harvard University Press..
Wiggins, G. and McTighe, J. (2005). Understanding by Design, Expanded 2nd Edition. Prentice Hall. pg 13-33.
Yelon, S. L. (2001). Goal-Directed Instructional Design: A Practical Guide to Instructional Planning for Teachers and Trainers. Michigan State University: Self-published, Not in electronic format.


